This is a note on how I change a tyre, it is not the way to change a tyre. Different people, and different car manufacturers have differing ways of doing it. Always read the instructions.
If you do not feel confident, then do not attempt it. Get a suitable person to help you. This is another good reason for being a member of a break-down organisation
What does it feel like to have a puncture whilst driving?
You will normally know that you have potentially got a problem with the tyre, because you have probably just hit the kerb, or driven over a glass bottle, or something similar.
You may just find that the steering is not as “sharp” as it was a moment ago, the car may be gently (or not so gently ) be pulling to one side or the other.
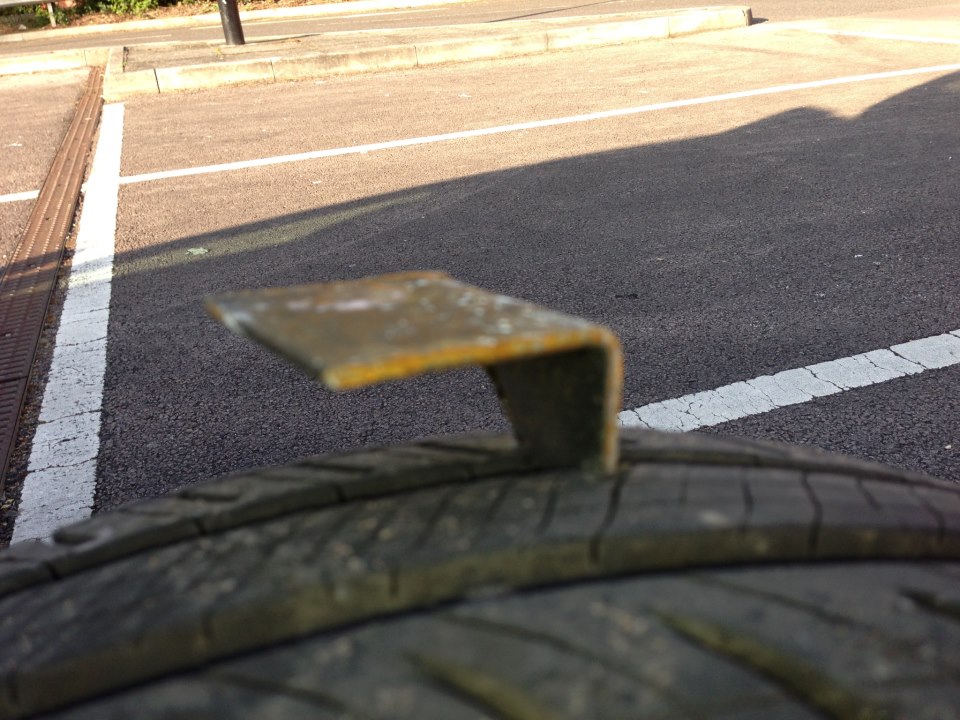
You might find that you can hear a “ticking” noise, made by a screw / nail etc making contact with the road surface as you are driving, hitting the tarmac at each rotation of the tyre.
On one occasion we had just rolled to a stop, and parked. We both looked at each other whilst we could “sense” that the car was dipping on the left side, as the air gently escaped.
Sometimes it is just obvious that you have got a tyre problem.
If you do not feel confident, then do not attempt it. Get a suitable person to help you. This is another good reason for being a member of a break-down organisation
What does it feel like to have a puncture whilst driving?
You will normally know that you have potentially got a problem with the tyre, because you have probably just hit the kerb, or driven over a glass bottle, or something similar.
You may just find that the steering is not as “sharp” as it was a moment ago, the car may be gently (or not so gently ) be pulling to one side or the other.
You might find that you can hear a “ticking” noise, made by a screw / nail etc making contact with the road surface as you are driving, hitting the tarmac at each rotation of the tyre.
On one occasion we had just rolled to a stop, and parked. We both looked at each other whilst we could “sense” that the car was dipping on the left side, as the air gently escaped.
Sometimes it is just obvious that you have got a tyre problem.
Where to stop?
Easy answer… somewhere safe, but soon, before you shred the tyre between the wheel rim and the road.
Do not brake hard to slow the vehicle down, but brake gently, until you are sure you can still control the steering safely whilst braking.
Try to get off the normal driving position on the road, but try to stop where the ground is both level and firm, firm enough to hold the jack steady as you change the tyre.
Warning triangle or no triangle?
The Highway Code recommends that you place an appropriate warning triangle 45m before the car, on the same side of the road. It should be placed before a bend, or before the summit of a hill, to give other road users warning of the hazard ahead. Please keep in mind that the typical stopping
distance of a car travelling at 40mph is 36m, and at 70mph it is 96m. I would ensure that I give the other road users as much warning as I sensibly can. Care should be taken when setting out, or collecting the triangle, as you will be walking away from, and facing away from, the oncoming traffic. Try to keep well off the road as you walk to position or collect the triangle.
Where is the spare tyre? Or is it just a can of sealant?
Different cars keep the “spare” in different places. Some are under the car boot, and need to be released from under the car, or from inside the bottom of the boot. Some cars have the spare resting in a compartment in the bottom of the boot. Either way, you are probably going to have to unload the contents of the boot before getting proper access to the spare. Some cars have a full-sized spare wheel, the same size as the other four. Some have a “Space-Saver” tyre, narrower and lighter than a full-size tyre. But you are still going to have to fit the full-sized tyre somewhere in the car until you can get it fixed and refitted. Some cars just have a can of compressed “sealant”, that fits onto the tyre valve, and sprays into, and fills up, and temporarily block the tyre and the puncture, as long as it is a small puncture.
If the tyre is ripped I don’t think a spray can is going to fix the problem.
How to secure the car
Ideally you will be able to park the car off the road, on a solid and flat surface. I’m sure that if you explained the situation to a house-owner, or farmer, they would be willing to let you borrow part of their driveway for a few minutes.
I always leave the car in first or reverse gear, with the handbrake fully applied. The idea is to make the car as stable as possible, whilst it will be balanced on only three wheels. You definitely DO NOT want the car to roll or move at all when it is resting on the jack. A couple of stones, or bits of old fence post, or branches, could be used to chock the wheels and secure the car so that it cannot be rolled forwards or backwards by mistake. Auto stores normally sell pairs of plastic wheel-chocks that could be stored permanently in the boot.
The tools you will need, and getting ready
So, we have the car safely secured and level off the road, we have got the spare tyre out, together with the jack, and spanners, and maybe we need the locking wheel-nut key as well.
Now we need to work out how to use the jack, and where it should be positioned so that it lifts the car without damaging it. Instructions for this will be in the car’s manual, if you still have it. Try to keep the equipment clean, and within easy reach of where you will be changing the tyre.
Removing the tyre
I set up the jack so that is in place, ready to lift the car. I place the spare tyre under the side of the car, within easy reach, so that if the jack collapses when we are removing the damaged tyre, the car will drop onto the spare tyre, not onto the ground. When this happens, hopefully the brake system will not be damaged by hitting the ground. You will also have a bit of space to remove and reset the
jack before trying again. It also means that if your toes were under the car when the jack collapses, then hopefully you won’t damage them, and hopefully you won’t ever put your toes under the car again.
Once the jack is tensioned, I then loosen all the wheel nuts on the damaged wheel. I only loosen them enough to be able to turn them with fingers, not a spanner, I do not take them off.
I then lift the car on the jack until the tyre is clear of the ground, leaving enough room for the spare, inflated, round tyre to be fitted easily and quickly. Once the tyre is high enough, I then remove all but one nut completely from the tyre, and put them somewhere clean and close-by. I then gently remove the last nut, putting it with the others. Gently removing the damaged wheel, I place that under the car, so that it becomes the “toe-saver”.
Replacing the tyre
Gently and calmly removing the spare from under the car, I fit it gently onto the car, and immediately refit one nut finger-tight, and then all the others, again, finger-tight, ensuring that the wheel is correctly fitted to the car. Once the spare tyre is fitted onto the car, I then remove the toe-saver tyre, and lower the jack so that the car is resting gently on the ground again.
Lowering the jack until the tyre grips the ground, I then tighten the nuts onto the wheel. Don’t tighten each one completely, working round the tyre in a circle, but work on one nut, then go the opposite one, then to the other opposite one, almost as if you are “joining the dots” to draw a star shape. Tighten them all evenly, ensuring the wheel is correctly fitted. Once the tyre nuts are fully tightened, I then fully lower the jack
Tidying up
So, the car is fixed temporarily. You now need to pick up, clean, and pack away all the equipment you have used, including the damaged tyre. Try to get into the habit of putting it all away correctly, so that is ready to be used again next time.
Reduced speeds with the spare tyre
Most spare tyres have a label on them, stating that the maximum permitted speed on that tyre is 80Kph, or 50mph. This is because the tyre is normally narrower than the other tyres, which in turn means that there is less grip for steering, acceleration, and braking than the other tyres.
If using the sealant can, I believe that the speed is still limited, and you should only travel a short distance on that damaged tyre.
Getting the tyre fixed or replaced
Get the tyre fixed or replaced as soon as you can. The longer you delay it, the more likely you are to forget about it, until the next puncture, when you will wish that you had not delayed the repair.
Damage to the tyre may need the tyre to be replaced because of the size, the type, or the position of the damage. Do not hesitate… get the problem fixed!
As a general rule, you only have a puncture at any one or combination of the following situations:
You are in a hurry
It is raining
It is dark
It is snowing
It is muddy
It is a client’s first driving lesson
You are on a massive hill
You have just changed a tyre a couple of miles ago
You are smartly dressed.
Can I suggest the following?
You keep a torch in the car
You know where the locking wheel-nut key is
You learn how and where to put the jack
You keep a couple of plastic or rubber gloves in the boot with the jack etc
You keep an old car mat spare in the boot, for you to kneel on, or to put the nuts on
And most importantly…
You practice!
 RSS Feed